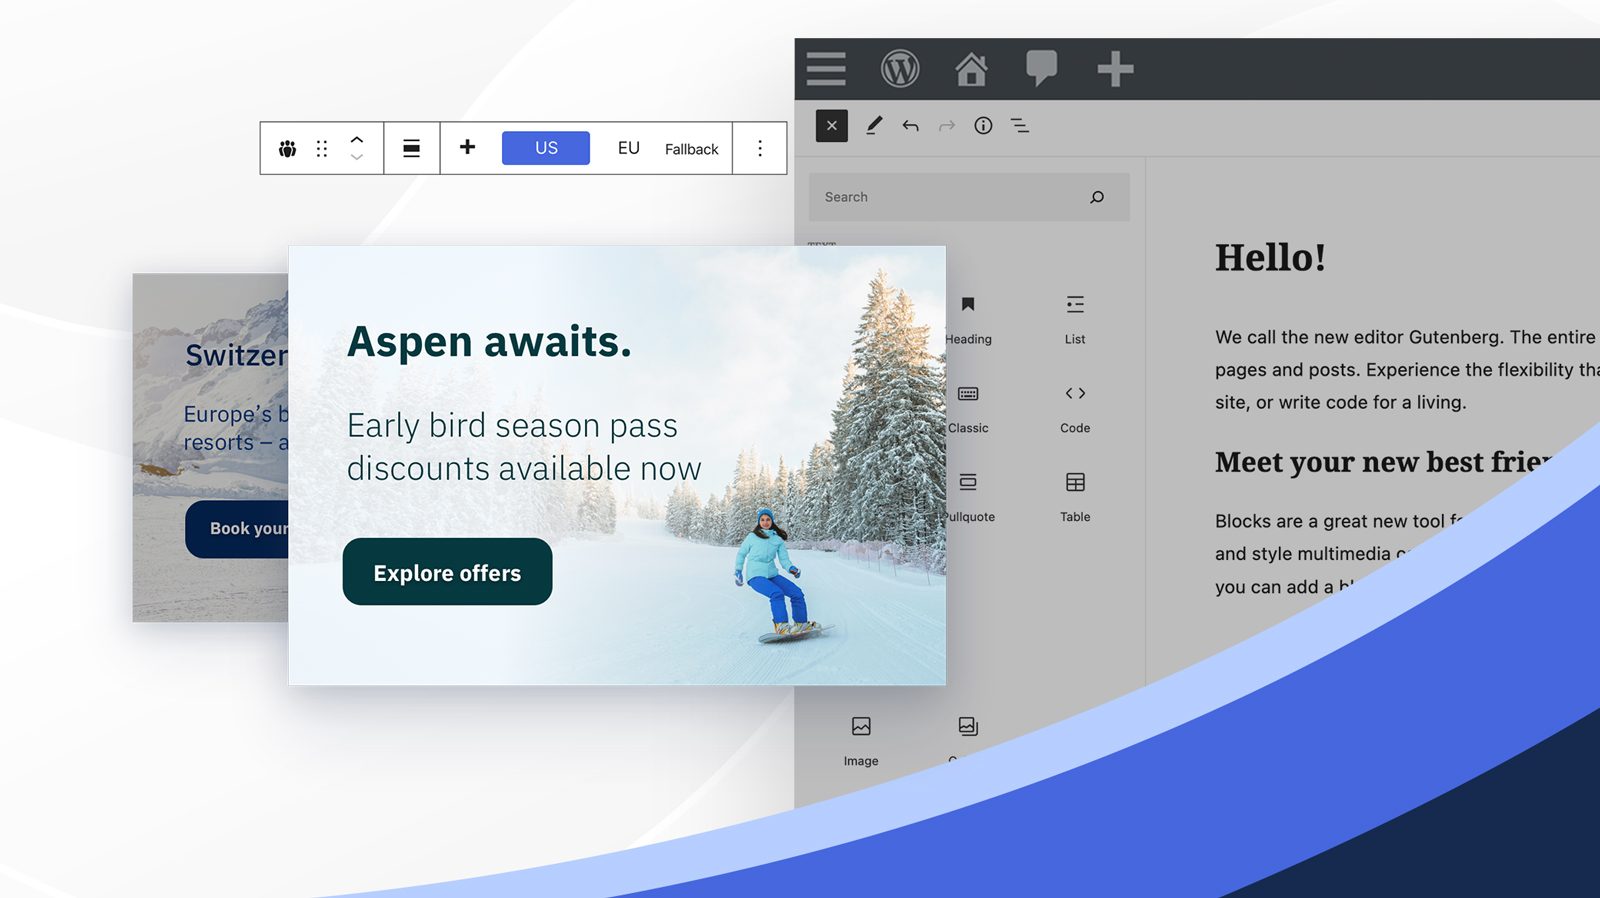
If you’ve ever bought something from Amazon where it’s introduced you to a product you weren’t searching for or read that extra article recommended to you, it’s likely you were a target of personalization. And they were successful!
The Altis digital experience platform brings the possibility of personalization to WordPress, enabling you to create tailored digital experiences for different types of audiences for your blog posts, product pages, landing pages and more. In this post, we’ll take a look at getting started with personalizing your content on WordPress with Altis.
Why use personalization?
It is said that companies that excel at personalization generate 40 percent more revenue from those activities than average players. McKinsey says that “seventy-one percent of consumers expect companies to deliver personalized interactions. And seventy-six percent get frustrated when this doesn’t happen.”
It wouldn’t be an understatement to say that personalization is a requirement for successful market outreach today and will only continue to rise in importance as data-driven practices continue to dominate.
One of the reasons WordPress powers 43% of the world’s websites is because of the ease of creating content on the platform. The flexibility of the block editor and the hundreds of thousands of plugins available allow users to create basic content and keep in line with Google’s ranking regulations.
Altis helps you take your content to the next level by providing personalization functionality. With it, you can deliver personalized content in a handful of steps.
Personalizing your WordPress website content
Step 1: Define your viable audiences
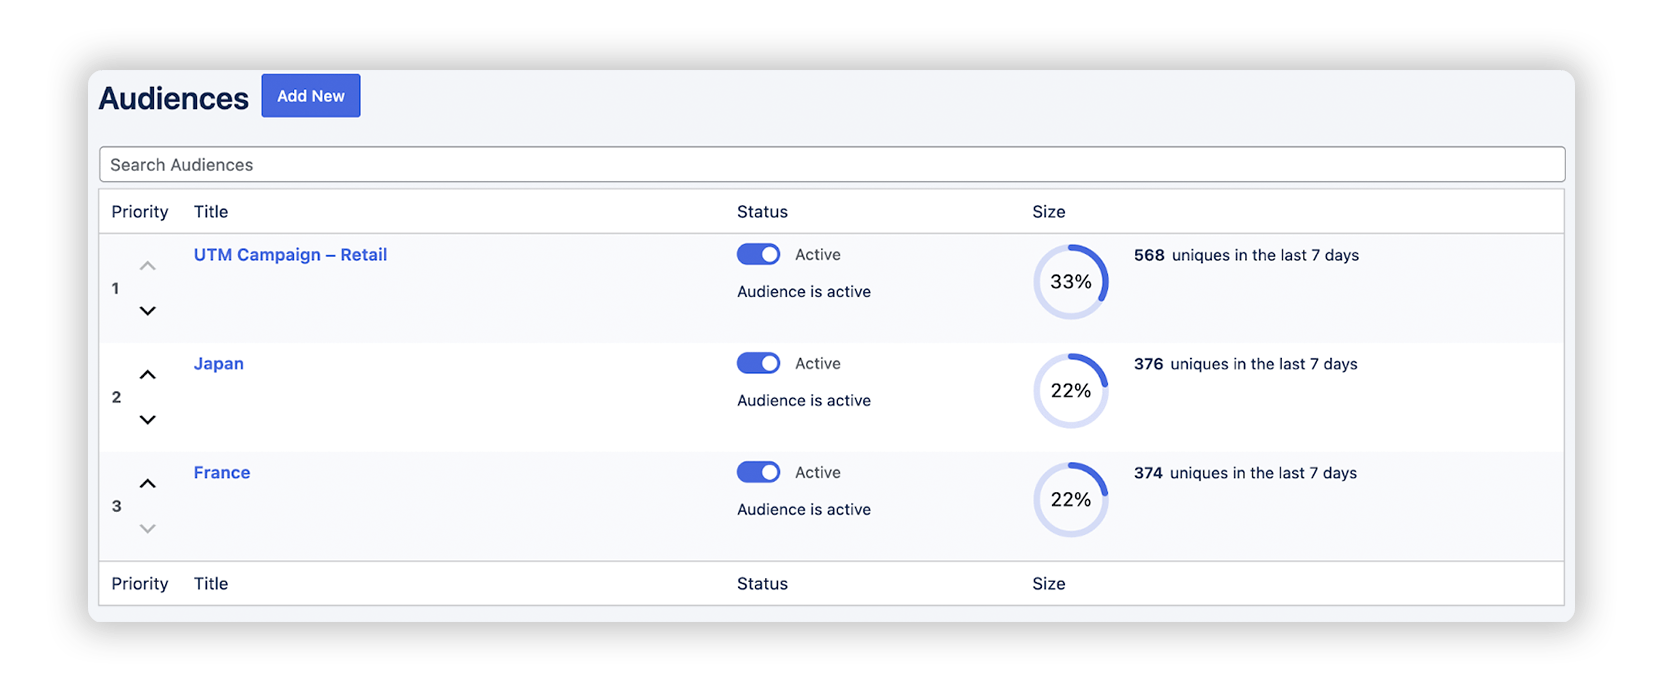
Look at your data to understand the different groups of audiences you have. It can be as simple as sorting through Google Analytics and forming some audience groups on paper. But if you’ve recently built out new target personas or rolled out a campaign, you likely already have an audience in mind.
In Altis, open the “Audiences” panel. This is where you’ll have a general overview of all the audience segments you will create and the portion of the overall web traffic they comprise.
Step 2: Build your audiences
Define your audience and filter it down according to various criteria such as location, UTM tag and more. WordPress by default doesn’t allow you to define an audience set for given content; you can, however, always strive to better categorize your posts and pages so that individual audiences are able to discover interesting content on their own.
In the Audiences panel, select “Add new” to begin building a new audience.
From this interface, you can quite easily segment the audience allowing you to target visitors across 25 default variables including specific campaigns, certain countries, different browsers and operating systems, and more.
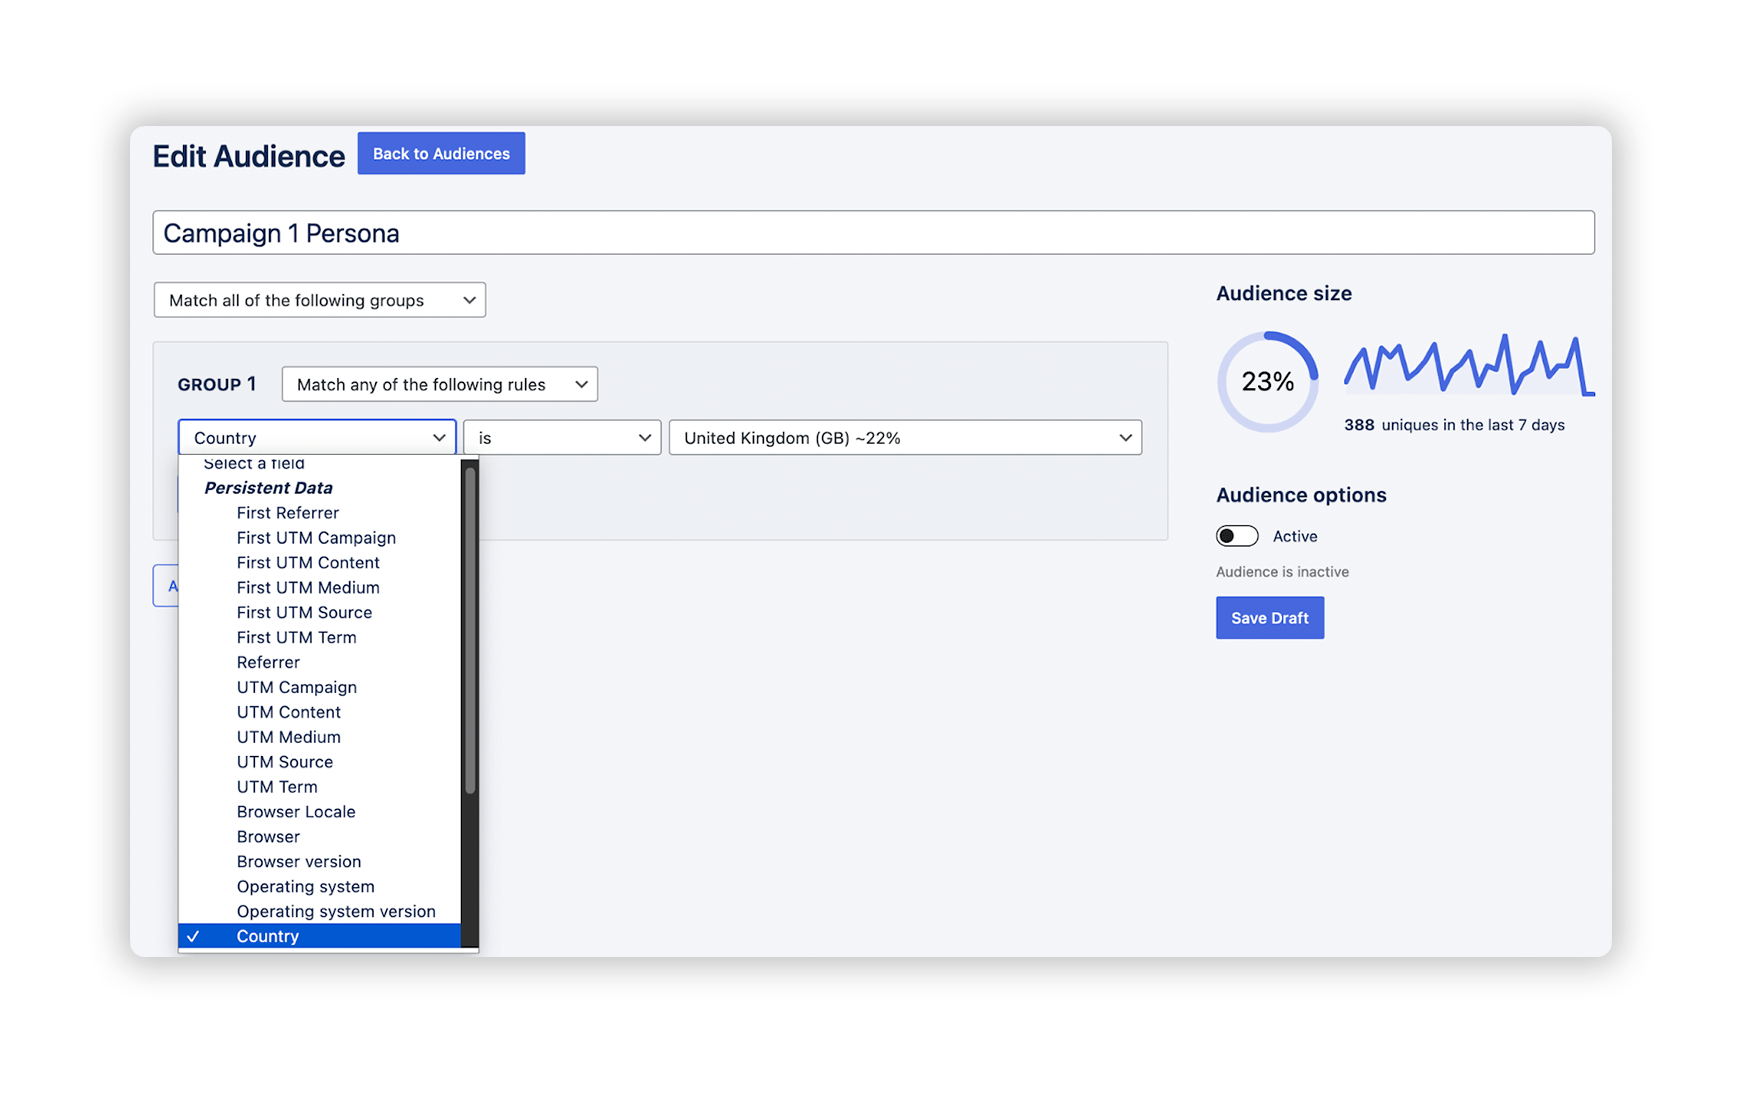
Set combinations of these rules (called Groups) to create filters and begin narrowing down your target audience. Watch how the “Audience size” visualization on the right-hand side changes as you add new rules to get an idea of how many visitors might see your personalized content.
Step 3: Set up your content in the block editor
When delivering personalized content, the user shouldn’t even be aware the webpage is different from other users’ experiences. This means the content variations should appear on your WordPress site with the same URL to share across all of your target personas, regardless of which variation they view on the page.
In Altis, the Personalized Content Block gives you an easy interface to deliver your personalized content across your entire website.
Simply insert a Personalized Content Block type in the block editor and start inserting your audience-specific content within the block. Press the “+” button to add more content variants. The default content served to non-segmented visitors will appear in the “Fallback” variant.
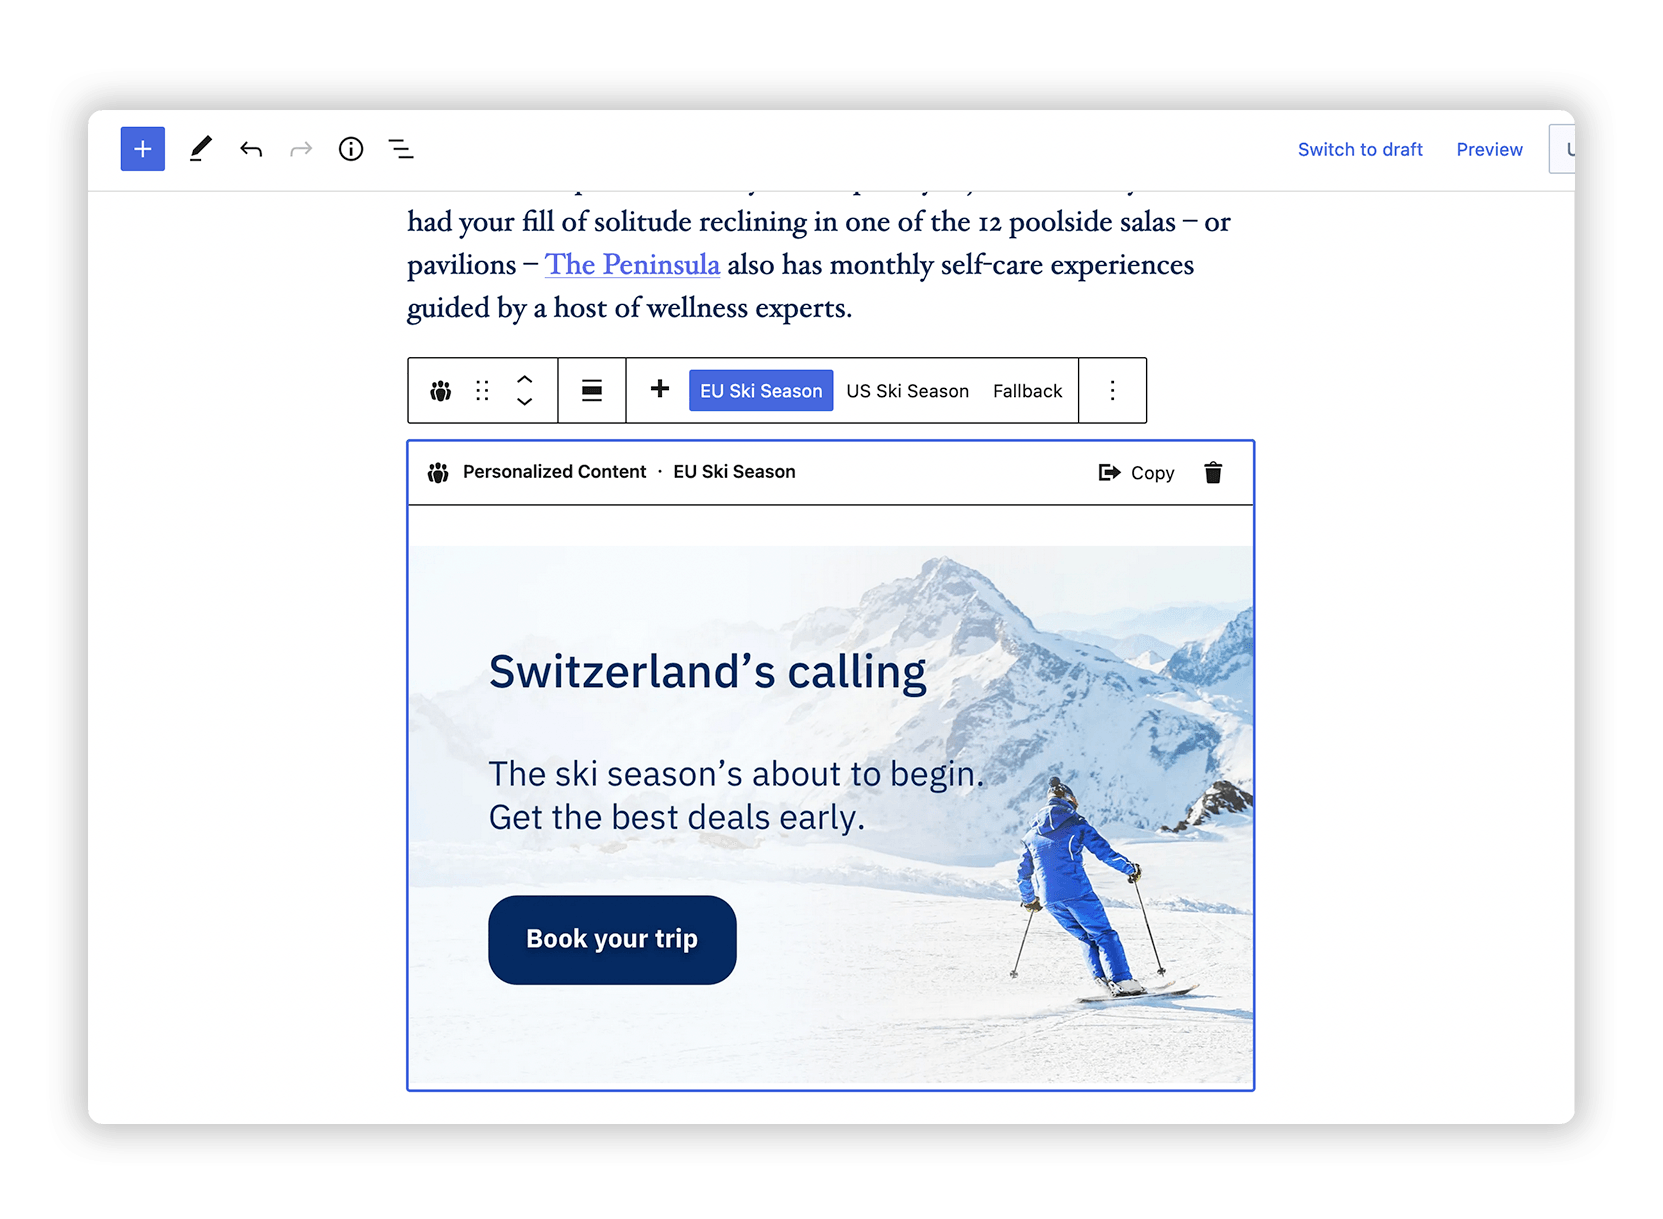
You should explore personalisation beyond just text changes – consider adding forms, different layouts, videos and other rich content where necessary.
In the block settings, assign the audiences you build to their corresponding variants.
Step 4. Publish and reiterate
Nicely done – your personalized content variations are ready for your audiences! Just hit Publish, and let Altis take control.
Our job doesn’t end there, however. As it is with writing any piece of content, you need time for both your audience to consume what you’ve written and for you to assess engagement levels. Put a time limit to each personalized piece, analyze the data and optimize the content.
On Altis, you can quickly review the impact of your personalized content and have a visual understanding of how well your work is doing.
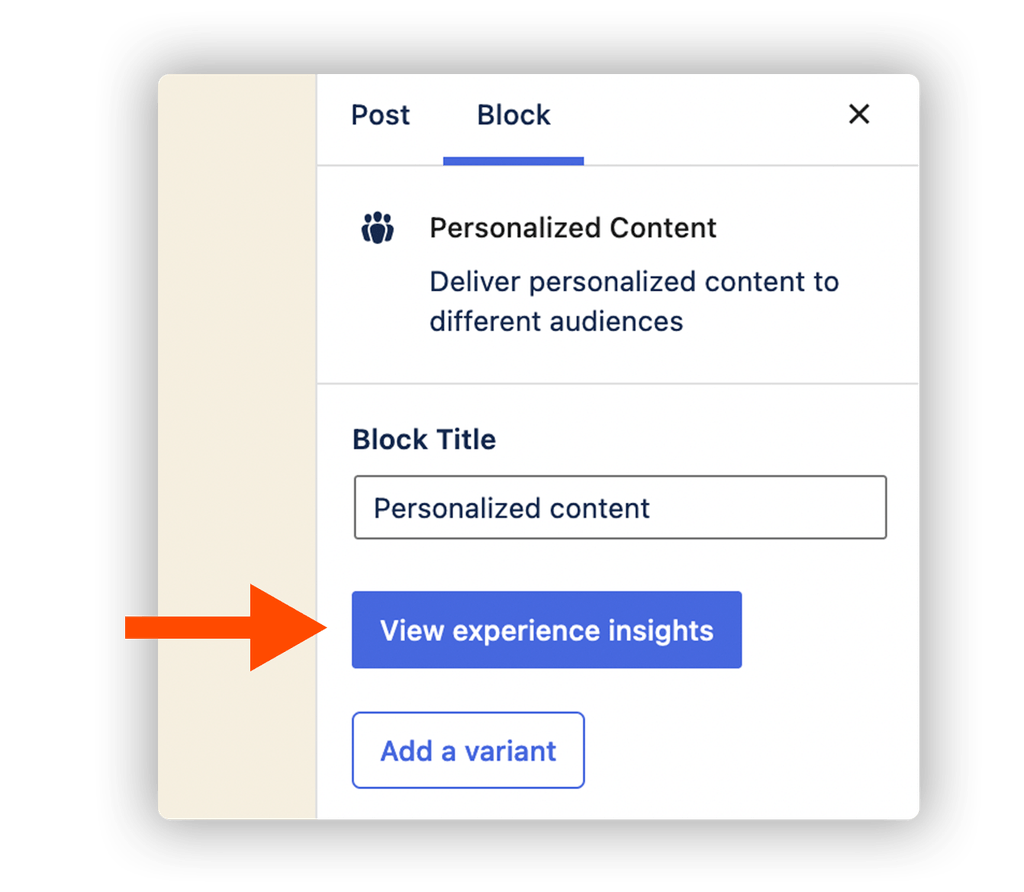
In the personalized block settings, click on “View experience insights” to get an overview of the results of your content personalization.
From here you will have an overview of the effectiveness of each personalized content variant compared to the fallback content. Use this information to continue to reiterate and optimize content across your site.
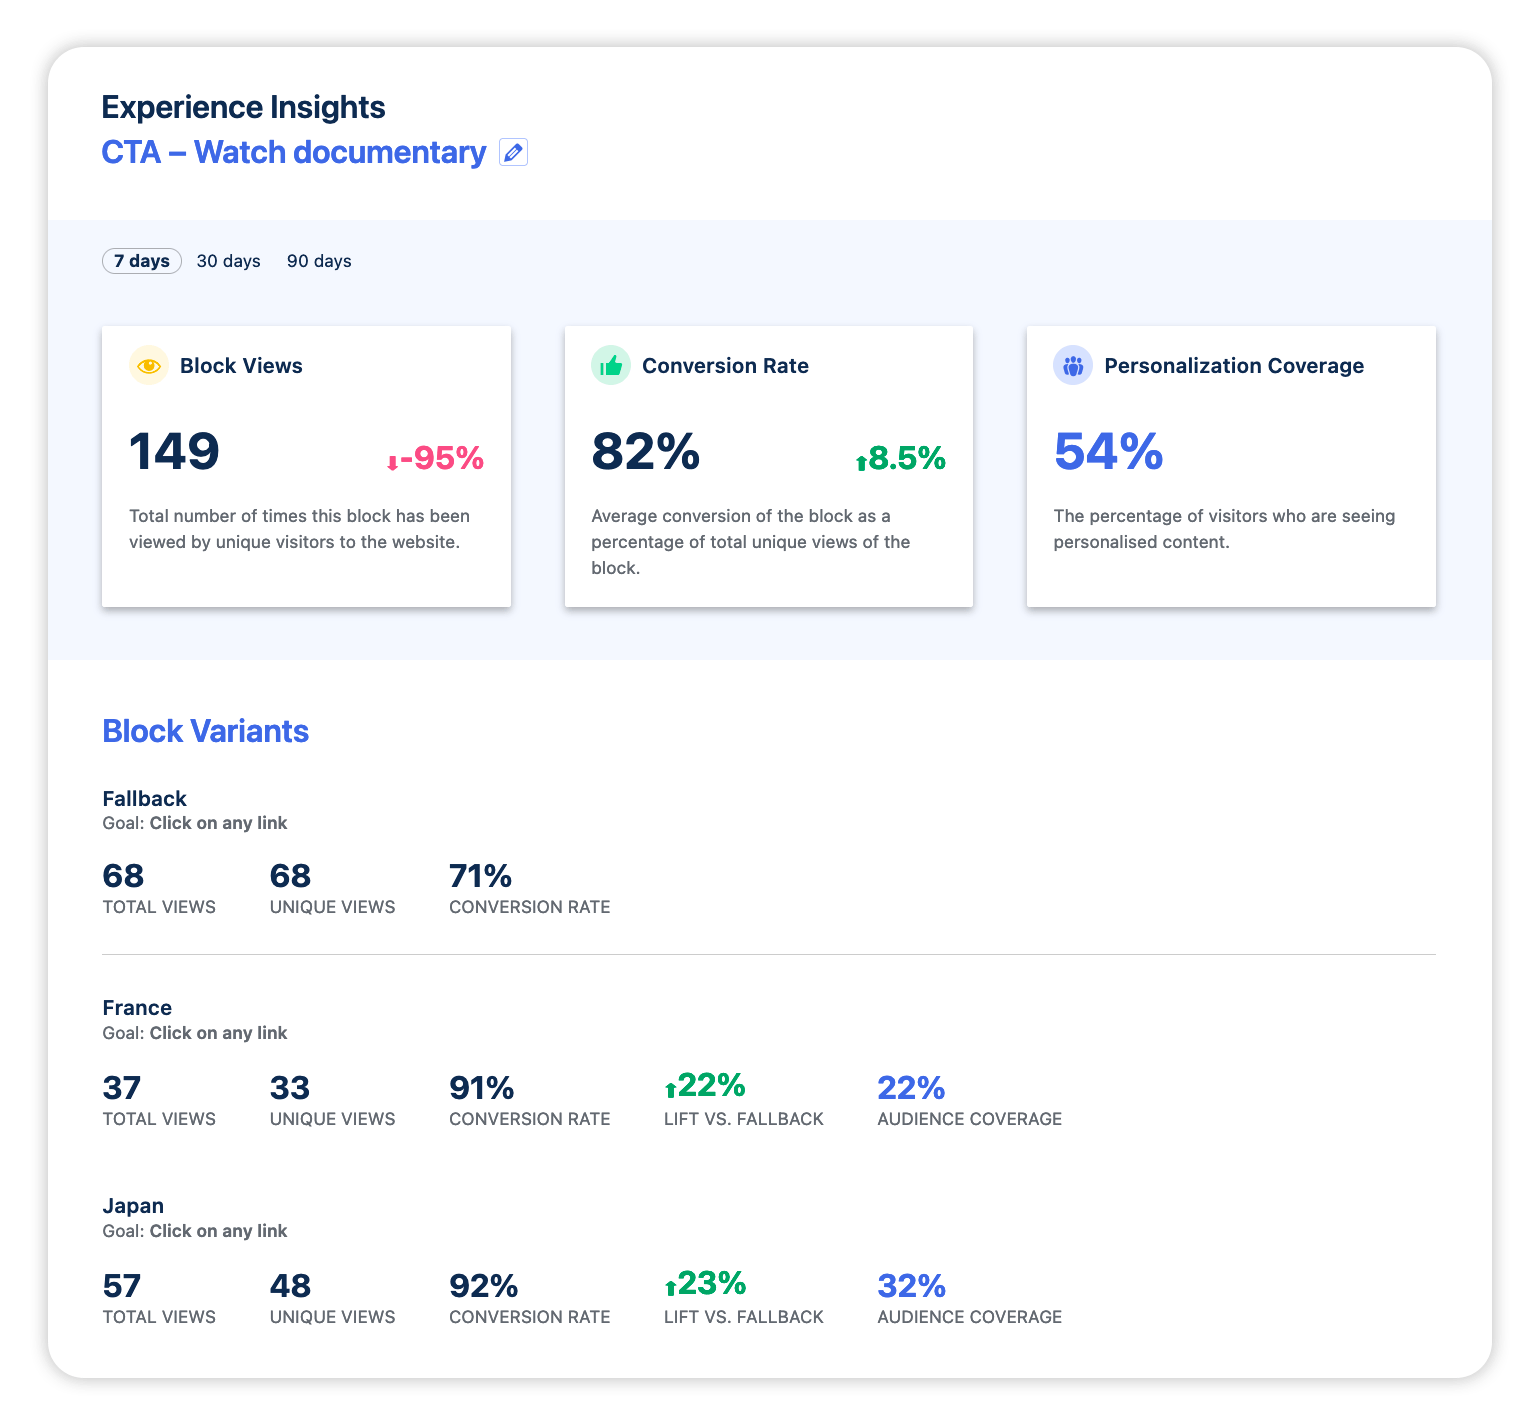
The data should tell you what’s working and what’s not – just don’t stop testing new content!
Step 5: Personalize in even more places!
Once you’ve started with personalization at the regular content or campaign level, you can start thinking about embedding it at a more structural level across your website. Some of the most successful personalization strategies look into:
- Serving personalized homepages
- Displaying personalized product recommendations
- Creating better user journeys
- Presenting different landing pages for different personas
- And much more
Wrapping up
WordPress makes it difficult to do basic personalization right out of the box – but it is possible. A DXP like Altis makes personalization practices far more viable. Want to find out how to drive more effective digital experiences for your audiences? We’d be happy to show you how.

